
Once upon a time I had this wonderful dream to stencil a wall in our master bedroom with the smallest stencil known to mankind.... Don't get me wrong, I absolutely love the Moroccan Trellis Stencil I bought from Sarah M. Dorsey Designs, it just was a beast to use for an entire wall, especially for a stenciling noob like myself.
 |
Sarah's blog is one of my absolute favorites because she always makes awesome, large scale DIY projects basically from scratch, all the while making it look EASY PEASY. Obviously, after seeing her wonderful stencil projects, I thought, "I could totally do that to an entire wall!" Little did I know, friends...little did I know.
I had painted the other three walls in our master bedroom what seems like ages ago. Okay not quite ages, but all the way back in August before our wedding. Knowing I would eventually (ahem, 6 months later) want to stencil the wall behind the bed, I just primed over the old burnt orange wall color and left it white for the past 6 months. Remember this oldie but goodie from the original house tour?? So happy it looks much different now!
April 2013-BEFORE

August 2013- PROGRESS
 |
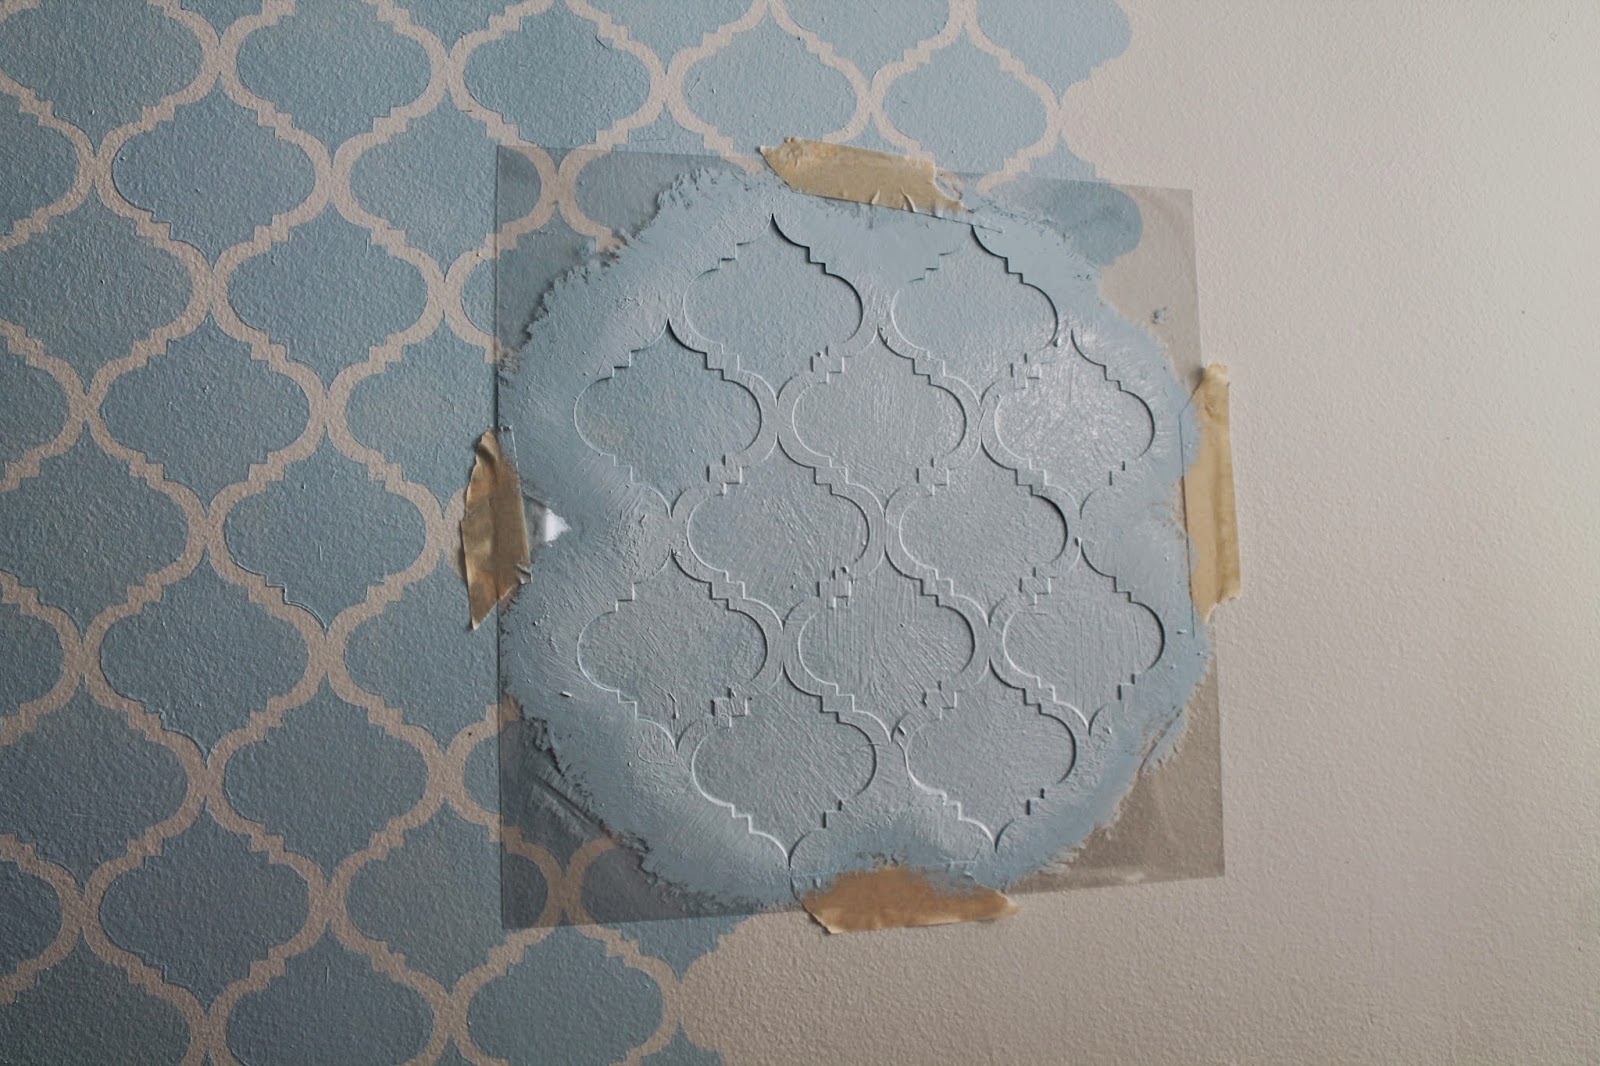
| You can see the size of the 16" x 16" stencil taped to the wall in comparison to the entire wall. |
I finally mustered up the courage to tackle the beast of a stencil wall late in February and decided to take it slow and steady over multiple days. Even then, it took me three days worth of work split up over four weeks, and a combined total of 22 hours to complete the entire wall...
Day One- 8 Hours (Finished the section behind the bed all the way up to the ceiling but forgot to take a final picture.)

Day Two- 4 Hours

And finally, after a 10 hour session last week and because I was finally getting a system going, I was able to finish the right side as well as the entire left side.
I have a sincere love/ hate relationship with this wall. I love the final look, but the size of the stencil was very small which made it difficult to keep level. Needless to say, there are definitely some uneven spots and other areas where I had to "piece" together the single trellis designs to make it fit and look semi-even. My inner perfectionist was crawling into a corner the entire time but in the end, it is very minute and hardly noticeable to anyone but myself.
Without further ado, here's the final product!!
Day Three- AFTER 10 hours

I love the subtlety of the stencil being painted in the same Martha Stewart Heavenly Blue as the other walls and yet up close the pattern is very intricate. The gold, white, and black accents throughout the room also help make it pop which makes it more modern looking. Also, you may notice I added the Pottery Barn duvet cover, grey textured curtains from Target, and the two glass and brass lamps from Target recently. One of my favorite parts about the lamps is the fact that you can seen the stencil through them.

I used Martha Stewart Stencil Brushes for the entire wall (I got them for 40% off at Michael's which came to about $10), mainly using the largest brush in the set but sometimes varying to the smaller sizes for the tight corners. Sarah's stencils come with an instruction sheet on how to best paint the stencil so I followed her directions pretty closely. I would start by taping the stencil on the wall where it lined up with the already stenciled part of the wall and then start at the top left trellis pattern pulling in from the top and bottom first, then the sides, and then diagonally across each trellis to complete the stencil before letting it dry and re-taping it to a new section. I suggest watching (more like listening to) an entire season of a beloved show (for me it was DVR'd episodes of Walking Dead, Grey's Anatomy, and Scandal!) as well as jelly beans or small candy for sugar boosts which helps keep the motivation level up. ;)

Another one of my favorite parts of the wall is where the painted wall meets the stenciled wall. Something about it just makes me giddy that I actually completed the wall.


I can't tell you how happy I am to have this project under my belt. I had a mixture of anxiety and dread going into this stenciling adventure, but I am super excited with the finished product. It is just one more step closer to finishing our Master Bedroom so I can reveal the entire thing!
All that's left is:
:: Buy bigger leaning mirror
:: Reupholster and add legs to the bench at the end of the bed
:: Find a round table to make a half table out of.
:: Buy a King sized bed frame (Long Term Goal)
Overall, the TIPS I can give to a first time stenciler are:
1.Try to find a larger stencil if possible (if not use a level frequently)
2. Take it slow at first in order to be as accurate as possible. The beginning stenciled areas are the most important to keeping the pattern even and regular.
3. Clean the stencil frequently. One of my main mistakes was letting the paint continue to cake onto the stencil which was much more difficult to remove later.
4. Use very little paint. More paint means a less accurate pattern. Use two coats if necessary.
5. Don't beat yourself up about small irregularities. Small mistakes are hardly noticeable in the big picture.
6. Try not to get too overwhelmed if you're doing a large area. There were many times when I called Brandon up into the room and attempted to convince him I should just paint over the entire thing. Thankfully he pushed me to finish it and I'm glad I did.
Hope this helps!
Here's me, signing off!

Linked up with Inspire Me Please.
Peace,
Allison
Outstanding work author. Knowledgeable enough. We will surely share your work. Anyway, If you are interested and looking for
ReplyDeletecurtain and blinds Singaporeyou may visit our website. You can also check our available services to offer. Thank you and More power!!
Very significant Information for us, I have think the representation of this Information is actually superb one. This is my first visit to your site. Vertical Blinds Price
ReplyDelete